Clipping Path Eu – Express wonderful tips on picture altering administration and Photoshop Tutorial. Today we share a stunning tip on Image Cropping/Resizing/Rotating.
Rotate Photo
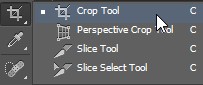
The essential thing we'll learn is the way by which to simply rotate a photo by hand. We do that using the Crop Tool. I'll pick the Crop Tool from the Toolbar along the left of the screen:

Principle Image
When I select the Crop Tool, Photoshop envelops the photo with a hidden gather periphery. As we learned in the How To Crop Images instructional exercise, I could slight this default alter periphery and rather snap and drag inside the photo to draw my own. Nevertheless, since I have to rotate and settle the photo before I alter it, I'll remain with the default trim periphery for the present.
Product instrument
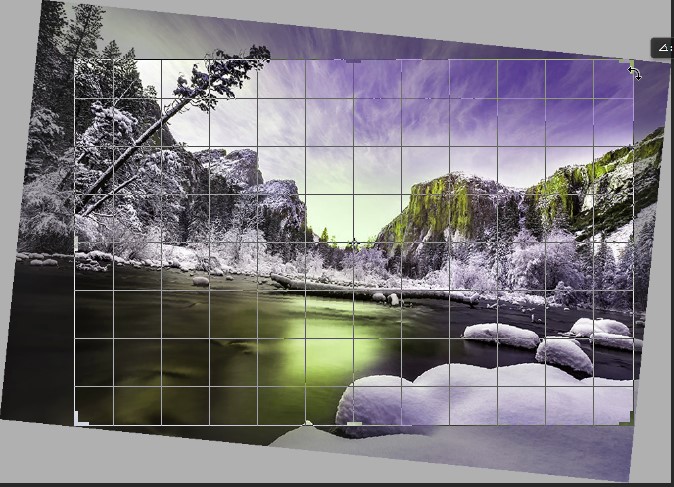
To impact the item to periphery more self-evident, I'll tap on the photo with the Crop Tool. This demonstrates the Rule of
Thirds 3 x 3 cross section before the photo:
Picture editing
To turn the photo, move your mouse cursor wherever outside the item periphery. Your cursor will change into a Rotate image (a twisted line with a dash on each end). I've zoomed in on it here to move a more concentrated deal with my cursor outside the upper right corner of the photo:
Pivot your picture
The Rotate cursor appears outside the yield edge.
With your mouse cursor outside the yield edge, click your mouse catch and hold it held down. When you click, the 3 x 3 grid will change into a more point by point arrange:
Another system shows up when you snap and hold your mouse get.
By then, with your mouse get still held down, drag your mouse to turn the photo. As you're turning it, look for something in the photo that should be straight, either vertically or on a level plane, and attempt to change it to the framework lines. Here, I'm using the water line just underneath the mountains as my guide:
Turning Your picture
Modifying the water line with the cross section lines as I turn the photo.
Notice that as you turn, Photoshop normally resizes the yield edge to keep it inside the cutoff points of the photo. Here, I've rotated it too far to ensure we can see how much humbler the yield periphery has advanced toward getting to be:
Turn choice
Photoshop keeps the collect periphery inside as far as possible as you turn.
I'll turn the photo back to the way I had it so the water line and the level system lines facilitate:
After pivot
Rotating the photo until the point when the moment that it appears to be straight.
Once the photo looks straight, release your mouse get. The overlay before the photo will change back to the Rule of Thirds 3 x 3 structure.
The Rule of Thirds organize returns when you release your mouse get.
Presently, you can resize the yield edge as required by clicking and dragging any of the handles around the periphery. I secured resizing the yield periphery in detail in our How To Crop Images instructional exercise, so here, I'll quickly resize the edge to make it fairly humbler, and I'll snap and drag inside the item periphery to reposition the photo:
Resizing the item edge and repositioning the photo in the wake of turning it.
When you're content with what things resemble, press Enter (Win)/Return (Mac) on your reassure to give the gather. Here's my result, an unmistakable change over the primary shape.
The turned and trimmed picture.
Directions to Crop Images Non-Destructively In Photoshop CS6
The Straighten Tool
Up until this point, we've seen how to turn a photo by hand. We should look at how to redress a photo using Photoshop's Straighten Tool.
To begin with, I'll repair my yield by heading off to the Edit menu in the Menu Bar along the most noteworthy purpose of the screen and picking Undo Crop. Or then again, I could fundamentally press Ctrl+Z (Win)/Command+Z (Mac) on my reassure:
Going to Edit > Undo Crop.
This benefits my photo back to the way it looked at first:
Fix choice
Back to the primary, uncropped picture.
The Straighten Tool is to some degree a covered device in Photoshop. You won't find it wherever in the Toolbar. Or maybe, you'll see it in the Options Bar at whatever point you have the Crop Tool picked.
I'll reselect the Crop Tool from the Toolbar.
To use the Straighten Tool, we first need to pick the Crop Tool.
By then, with the Crop Tool dynamic, I'll select the Straighten Tool from the Options Bar along the most noteworthy purpose of the screen:
Fix image choosing the Straighten Tool from the Options Bar.
Using the Straighten Tool is to a great degree essential. Essentially scan for something in your photo that should be straight, either on a level plane or vertically, and draw a line across finished it with the Straighten Tool. Photoshop will then use the edge of the line to thusly turn and correct the photo.
Since the water line in my photo should be even, I'll tap to its left side half to set a starting stage for the line. By then, with my mouse get still held down, I'll drag transversely finished to the right half of the water line to set the endpoint. Photoshop draws a thin, straight line between the two core interests:
Tap on one side of something that should be straight, by then keep your mouse get hold and drag to the contrary side.
When I release my mouse get, Photoshop looks purpose of the line and in a brief moment turns the photo with the objective that the water line appears to be straight. Notice that eventually, Photoshop has moreover resized the yield edge to keep it inside the breaking points of the photo:
Photoshop fixes the photo when you release your mouse get.
Lively Tip: Here's a helpful hint for using the Straighten Tool. You don't generally need to pick it from the Options Bar. Or maybe, with the Crop Tool dynamic, you can quickly change to the Straighten Tool just by crushing and holding the Ctrl(Win)/Command (Mac) key on your support.
Since the photo has been corrected, I'll again resize my item periphery by dragging the handles, and I'll snap and drag inside the edge to reposition the photo and change the structure.
I'll press Enter (Win)/Return (Mac) on my reassure to present the gather, and here's the come to fruition resulting in settling the photo with the Straighten Tool.
Check out Clipping Path EU Blog post for getting clear concept.
Comments
Post a Comment